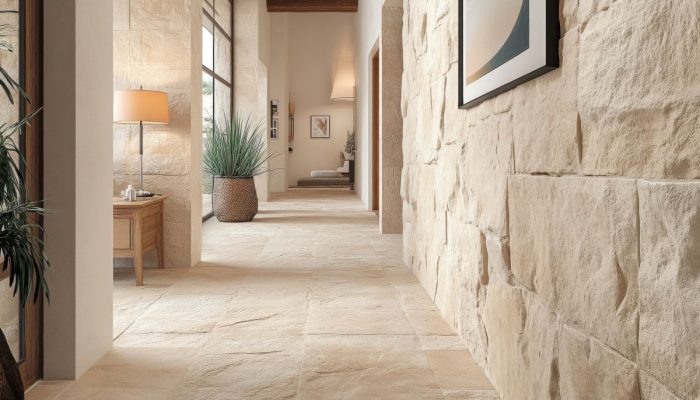
Underfloor heating in combination with tiles
It is often thought that floor tiles, also known as flagstones, create a cold and chilly floor, but tiles are an excellent choice for underfloor heating. Due to the small thickness of usually 1 cm, tiles easily absorb heat and also easily release it. Technically, tiles have a low thermal resistance, which means that heat is well conducted and evenly distributed throughout the room. This results in a comfortable experience, because the heat is evenly distributed. As a result, it takes less energy to heat the room compared to floor finishes with a high heat resistance, such as carpet.
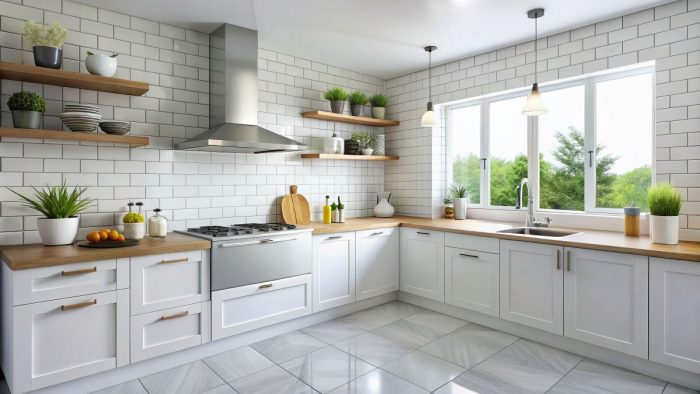
Which tiles are most appropriate for underfloor heating?
When selecting tiles for underfloor heating, there are a few factors to consider, such as the top layer, porosity, shape, dimensions and maintenance. In general, natural stone and ceramic tiles are the most suitable choice for underfloor heating.
Natural stone tiles: Natural stone tiles, such as marble, slate and travertine, contain properties that ensure that heat is efficiently absorbed and evenly distributed in a room. When choosing natural stone tiles, it is important to pay attention to the thickness and heat resistance so that the system can work optimally, but you will find more information on this here [link].
Ceramic tiles: Common ceramic tiles are split tiles (machine split from a large tile), double-fired tiles, porcelain stoneware tiles (made of china clay with a high scratch resistance), terracotta tiles (porous and not waterproof, made of simple baked clay), full-ceramic or stoneware tiles (minerals added and frost-resistant, can be installed indoors and outdoors), faience tiles (terracotta with a waterproof layer) and monocuisson tiles (cement tiles with a low wear resistance). Many of these tiles are available in both glazed and unglazed versions.
The technical terms, as mentioned above, are often absent on ceramic tiles, but their properties usually indicate which category they belong to. Despite their major differences, underfloor heating systems can be installed under all mentioned ceramic tiles.
Which tiles are not suitable for underfloor heating?
Although almost all tiles are suitable for underfloor heating, there are also exceptions. Mosaic tiles, for example, are often made of glass tiles, a choice that is strongly discouraged. Glass tiles are fragile and tend to break or crack easily, especially with temperature changes. In addition, glass is not a good conductor of heat. Due to these factors, it is generally not recommended to use glass tiles in rooms with underfloor heating. Other tiles that may not be ideal for underfloor heating include terracotta tiles, due to their porosity, and metal tiles such as stainless steel and aluminium.
Mass production of tiles
Mass production is an efficient way to produce tiles on a large scale and can be applied to various types of tiles, such as ceramic tiles, floor tiles, wall tiles and mosaic tiles.
The production process starts with the selection of raw materials such as clay, porcelain, cement or natural stone, depending on the type of tile being produced. The raw materials are then processed and mixed into a homogeneous mass. This mass is formed into tiles using various techniques, such as pressing, extruding or casting.
After shaping, the tiles are dried to allow excess moisture to evaporate to prevent deformation and cracking later in the firing process. The dried tiles are then baked in ovens at high temperatures, depending on the type of tile and the desired result. The baking process ensures that the tiles become durable and hard.
After firing, the tiles are checked for quality and any defects. Defective tiles are removed, while approved tiles are sorted by size, color and pattern. These are then packaged and prepared for distribution to hardware stores, tile shops and other outlets.
Mass production of tiles allows tiles to be produced on a large scale and at a lower cost, making them affordable for a wide range of consumers and business customers.
Ceramic parquet
Due to the rapid technological developments in the ceramic industry, it is now possible to create ceramic wood imitation tiles with a very realistic wood look. As a result, floors are laid that have the warm appearance of wood such as oak or cherry, but have the advantages of ceramics. The colour options range from grey teak to warm honey colours and dark wenge. Many of these ceramic parquet tiles not only look like wood, but also have the same tactile structure. The dimensions of these tiles often vary between lengths of 110 and 180 cm and widths of 20 or 30 cm. When these ceramic strips are laid in a random pattern, similar to a wooden floor, it is difficult to tell the difference from real wood.
Laying ceramic parquet
Ceramic parquet can be laid in various ways, similar to wooden parquet, such as herringbone or brick bond. To make the ceramic floor resemble a wooden floor as much as possible, it is best to lay the ceramic parquet in an irregular pattern. To avoid wasting tiles, you can use the leftovers (i.e. cutting loss) from one side of the room to start a new row on the other side of the room.
Price comparison between tiles and natural stone
In general, the price of natural stone tiles is on average higher than that of ceramic tiles. The price differences between the two are influenced by, among other things, the material, rarity and production process. Although the prices for exclusive ceramic tiles can also mount, natural stone is generally more expensive.
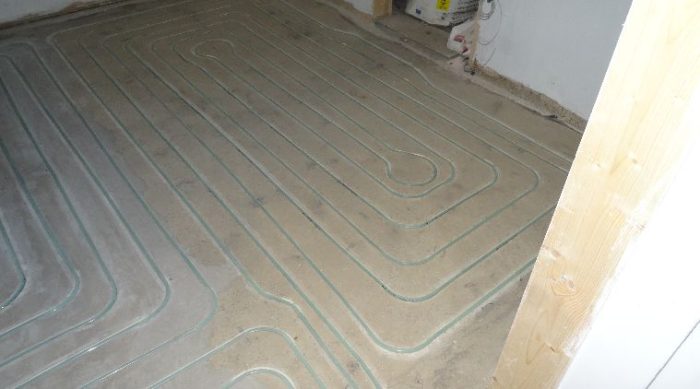
Substrate preparation for tiles and underfloor heating
Preparing the substrate for the installation of underfloor heating is an essential step to ensure the strength, cohesion and stability of the floor surface (see more information under ‘type of screeds’). For example, irregularities should not exceed 3 to 4 mm over a span of 2 metres. If there are any irregularities, they are preferably levelled at least 48 hours in advance in connection with the curing time before the underfloor heating system is installed.
In addition, the floor surface must also be free of glue residues, old tar layers or other floor products in order to guarantee a seamless installation. This should also be done before the underfloor heating system is installed. If a professional or mechanical process is required to create an even floor surface, this cannot be carried out until after installation due to possible damage to the JK® flextube.
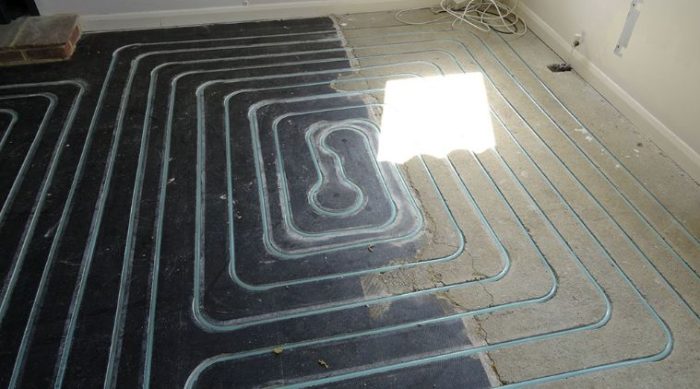
We cannot emphasise it enough, but a flat and smooth floor is essential for a qualitative and neat installation of the underfloor heating. If the floor is uneven, it is likely that a lot of dust will be released during the milling and that the underfloor heating pipes will not lie neatly in the floor.
On porous surfaces it is advisable to apply a primer first and to ensure that the floor is clean and free of dust. This work must be carried out after the JK® system has been installed.
Bonding and adhesives for tiling on underfloor heating
It is important to take extra care when laying tiles when an underfloor heating system is installed. If floors are not carefully placed above the underfloor heating system, cracks can appear and tiles can even come loose. To prevent this, it is necessary to work with flexible adhesive products that can partly absorb the movement of the substrate.
The maximum allowed tile size for the use of tile adhesive is determined by the coefficient of expansion. This simply means that the larger the tile, the more flexible the adhesive must be to adequately accommodate the expansion or contraction.
Consult the technical product specification of the relevant tile adhesive at all times and adhere to the manufacturer’s instructions for preparing the adhesive. This has a decisive impact on its use, and the JK® system is also subject to this.
For bonding on underfloor heating, and in particular the JK® system, we recommend the following:
- Choose the right glue that is suitable for underfloor heating.
- Ensure a complete filling (the entire tile must lie in a bed of glue)
- Make sure that the double bonding is done correctly.
- Apply adhesive strips to both the underside of the tile and the substrate before installing the tile. Pressing and slightly shifting the tile ensures that both adhesive layers form a homogeneous layer.
- Use a trowel with large teeth suitable for the tile format so that it is easier to create an adhesive bed directly on the JK® system.
The above guidelines apply specifically to the JK® system. As a general guideline, correct bonding leads to a long-lasting and flexible bond between the screed and the tile, and also ensures optimum heat transfer from the JK system. Following this advice contributes to a successful and sustainable installation.
Laying patterns with underfloor heating
The laying pattern of tiles not only affects the appearance of the tiled floor, but can also affect the heat transfer efficiency of the underfloor heating system. It is recommended to install the tiles on the JK® system in such a way that the joints run straight in both directions. Other laying patterns such as half-brick, quarter-brick or other irregular patterns are certainly possible, but may require a different classification of the tile adhesive.
Expansion joints with underfloor heating
An expansion joint is an opening or space purposefully placed in strategic places between tiles, along walls or edge joints to accommodate the effects of heating and cooling. Since heating and cooling of the flooring materials can cause expansion and contraction, these joints help prevent stresses from building up and resulting in cracks or damage.
A tile finish is an adhesive structure and it is therefore important to take into account what will happen to the surface. If the substrate shrinks, expands, moves or bends, the tile, which is a rigid material, must be able to ‘move’ with it. If this is not possible, the tile will break.
Guidelines for expansion joints
Tile joint width guidelines may vary by country, product and type of tile and grout used. However, there are also some general guidelines for an optimal result:
- Ensure that existing dilatations in the substrate are continued in the tiling immediately above.
- Place an edge joint of 10 mm between vertical surfaces (such as walls or fixed elements) and the last row of tiles.
- Keep a minimum joint width of 5 mm between tiles.
- Only fill in the joints after at least 24 hours have passed after tiling.
Additional guidelines apply to ceramic parquet:
- Very narrow joints can be used with ceramic parquet floors.
- Match the grout colour to the wood look, making it appear like a groove in a wooden parquet floor and thus virtually invisible.
Regardless of the system, it is crucial to maintain accurate grouting practices as improper grout application can lead to tile breakage and cracking.
Use of decoupling mats with underfloor heating
In some situations, such as a new cement or concrete floor, where the substrate may be sensitive to movement or expansion and contraction, the use of decoupling mats can help. These come in many different shapes and sizes; for example, as membranes, thick mats, flat, corrugated and even elastic mats. The decoupling mats then provide a kind of protective layer that helps to make the floor more resistant to movements, temperature changes and stresses. The presence of the JK® system plays no role in this and has no influence whatsoever on whether or not to use a decoupling system. This completely depends on the condition of the underlying floor construction.
The preventive use of decoupling mats where this is actually unnecessary can even be undesirable in some situations. Tile floors, for example, have a low heat resistance and are therefore the ideal partner for an underfloor heating system. The unnecessary installation of a decoupling mat brings an extra layer of resistance that does not work in favour of underfloor heating. In addition, alternatives are also possible that often make the use of decoupling mats unnecessary, such as the use of flexible tile adhesive.
When in doubt about the use of decoupling mats, the advice is to always follow the guidelines of the floor installer or tiler and the adhesive manufacturer.
Wear-resistant tiles and underfloor heating
Tiles with a high PEI rating (e.g. PEI 4 or PEI 5) such as ceramic tiles and glazed porcelain are generally tiles that are more difficult to grind. These tiles often have a harder and denser composition than other types of tiles and are therefore virtually indestructible. The advantage is that they last a lifetime, the disadvantage that it is difficult to drill into such tiles, or grind them to install pipes at a later time.
Laying tiles on top of tiles
In some cases, the choice is made to keep an existing tiled floor and place new tiles over it. This is often possible when the old tiles are still firmly glued to the surface. This has the advantage that the existing tile floor does not have to be removed, which saves costs and waste. A disadvantage, however, is that the floor will then be higher, which can affect doors and thresholds, for example.
The JK® system can usually be installed on an existing tiled floor without any problems. However, a test groove is first made to ensure that the existing tiles are firmly connected to the substrate. After the JK® system has been installed, the new tiles can be glued on top of the existing floor.
Starting up underfloor heating after tiling
After the installation of the JK® system has been completed and the tiled floor has been laid, it is important that the tile adhesive has completely hardened before the underfloor heating is switched on for the first time. In most cases, this requires that the underfloor heating is not used for four to six weeks, to avoid the risk of possible tiles coming loose.
Once the underfloor heating is activated for the first time, it is then important to gradually increase the temperature. It is recommended to increase the underfloor heating in steps of about five degrees every two days. This means that the total start-up time can be up to approximately two weeks (14 days).
Sometimes alternative methods are also recommended by the glue manufacturers. One of these methods includes an initial period of 7 days during which the JK® system must not be operated. Thereafter, a low water temperature of a maximum of 25 degrees Celsius is maintained for 3 weeks, followed by a gradual increase of 5 degrees Celsius every 2 days, until the maximum temperature is reached. For the JK® system with an Eco-line manifold, the maximum water temperature is 50 degrees Celsius.
All methods are aimed at ensuring that the underfloor heating system is put into operation in a safe and effective manner, while preserving the durability and stability of the floor. Each floor has different moisture percentages and expansion fields, so the guidelines mentioned are general and the standard in the industry.